Category Archives: Garden Tips

Easiest Vegetables To Grow In Florida (Warm & Cool Season)

Easiest Vegetables To Grow In Florida (Warm & Cool Season)
Earth Works Gardens · Garden Tips
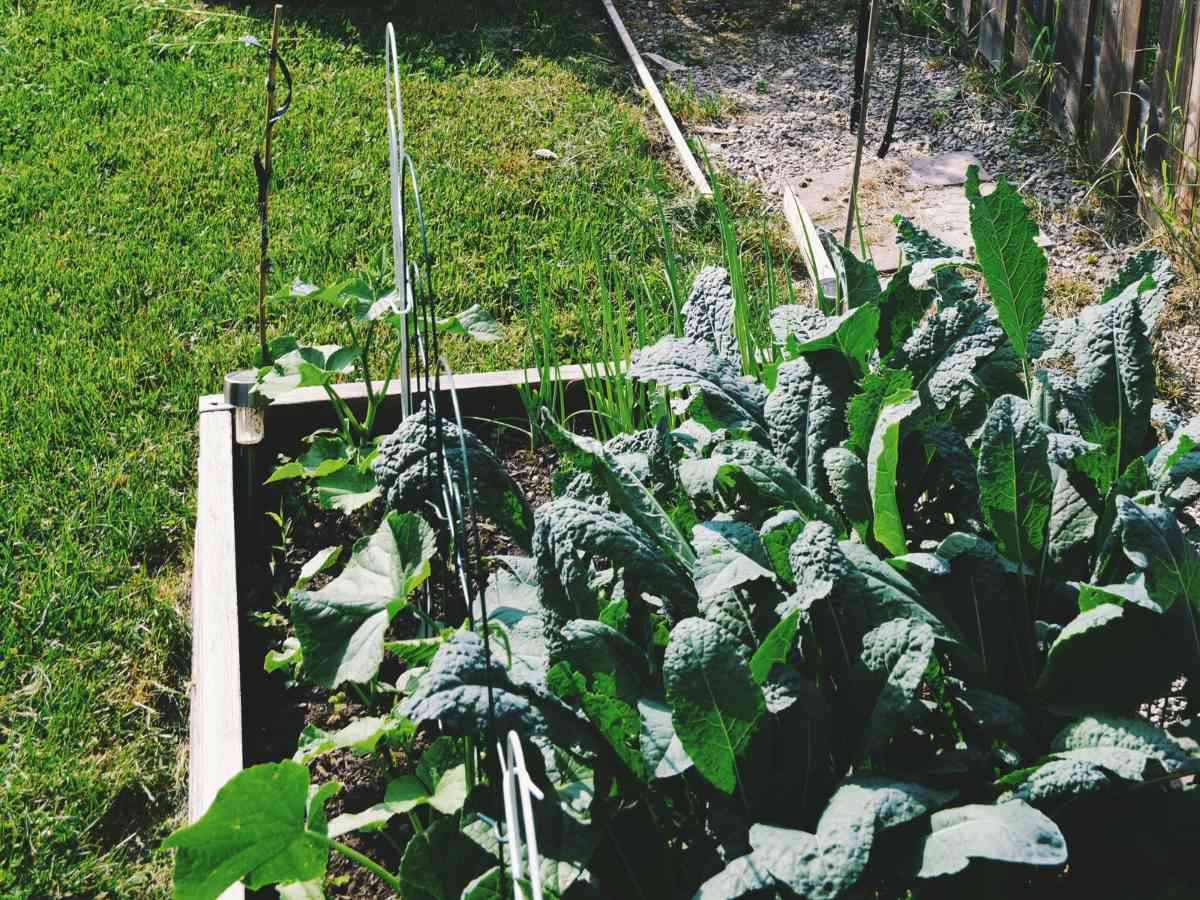
easiest vegetables to grow in a home garden in jacksonville fl

If you’re looking for the easiest vegetables to grow, Florida’s climate offers many good places to start. The state’s long growing calendar, mild winters, and warm summers mean there’s almost always something productive you can put in the ground or in a container on your balcony. This blog covers which simple vegetables to plant across Florida’s two growing seasons, what soil actually works in our sandy ground, and how to get started even if your only outdoor space is an apartment balcony.

Florida Gardening Seasons

Unlike most of the country, Florida doesn’t follow the traditional spring-summer growing model. Knowing which season you’re in is one of the most practical vegetable gardening tips anyone can give a Florida gardener, because what thrives in October is completely different from what survives in July. Understanding the two growing seasons — warm and cool — is the foundation of good gardening in this state.

Warm Season March – September Temperatures frequently climb into the 90s. Heavy rainfall June–September. Heat-tolerant crops thrive. Peppers · Sweet Potatoes · Eggplant · Okra · Black-Eyed Peas
Cool Season October – February Daily highs in the 60s and 70s. A prime window for leafy greens, root vegetables, and tomatoes. Tomatoes · Lettuce · Kale · Collards · Radishes

The Warm Season (Summer)

Florida’s warm season is generally from March through September. During this period, temperatures in Jacksonville frequently climb into the 90s, and the state experiences its heaviest rainfall, particularly from June through September. According to WeatherSpark, Jacksonville averages daily highs above 90°F from June through August, with high humidity throughout. For vegetable gardening, this means heat-tolerant crops that can handle direct sun and heavy afternoon rain are your best bet.

The Cool Season (Fall to Spring)

Florida’s cool season runs roughly from October through February. Temperatures in Northeast Florida during this period average daily highs in the 60s and 70s, with occasional freezes possible in January and February, according to the Wikipedia overview of Florida’s climate. For gardeners, this is actually a prime window. Leafy greens, root vegetables, and cool-weather crops that would turn bitter and stop producing in summer heat (a process known as “bolting”) thrive in Florida’s mild winters. Many gardeners find the cool season easier and more productive than summer.

The Easiest Vegetables To Grow In Your Florida Home

Here are ten simple vegetables to plant across Florida’s two growing seasons. Each one is selected for being forgiving, productive, and well-suited to Florida’s conditions, whether you’re a first-time gardener or just getting back into it.
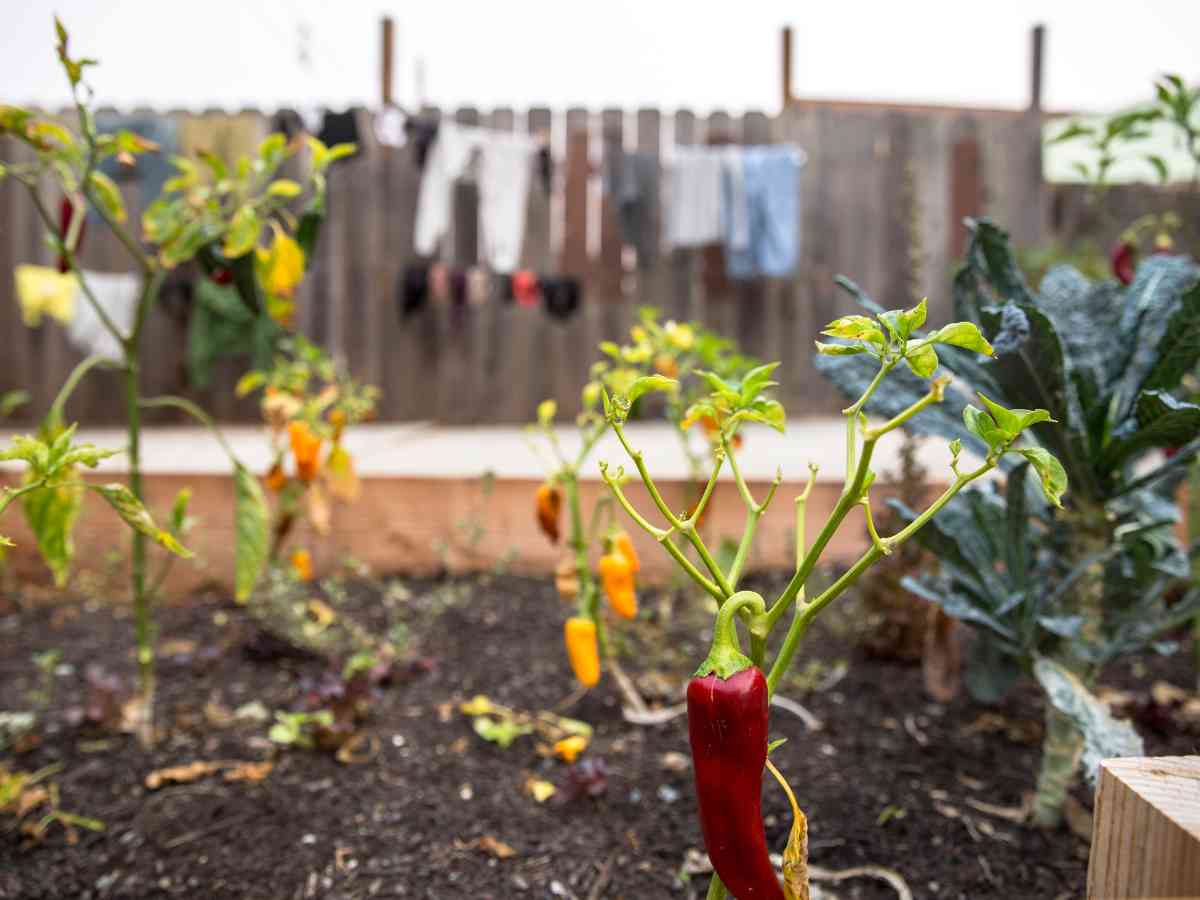
vegetables that require little care in jacksonville fl

Warm Season Vegetables

Bell Peppers

Bell peppers are one of the most rewarding warm-season crops for Florida gardeners. They prefer full sun and consistent moisture, and perform well in containers or raised beds. Transplants are recommended over direct seeding, and most varieties take 70 to 90 days from transplant to harvest. UF/IFAS recommends planting bell peppers in North Florida between February and April for the best results.

Sweet Potatoes

Sweet potatoes handle Florida’s summer heat better than almost any other crop. They’re drought-tolerant, spread quickly, and require little care once established, making them one of the top vegetables that require little care on this list. Plant slips (rooted cuttings) after the last frost. In North Florida, that’s typically between March and June. They take about 100 to 120 days to mature and are harvested in fall.

Eggplant

Eggplant loves Florida summers. This fruit is also heat-tolerant, productive, and relatively pest-resistant compared to other nightshades. Plant transplants in North Florida between February and March, or again in August for a fall crop. Varieties like ‘Dancer’ and ‘Black Beauty’ are proven performers in our climate.

Okra

Okra performs exceptionally well in Florida summers. It’s one of the quickest growing vegetables you can plant, often ready to harvest 50 to 65 days from seed. Direct sow after soil temperatures reach at least 65°F and harvest pods when they’re 3 to 4 inches long for the best texture and flavor.

Black-Eyed Peas

Black-eyed peas are a Florida garden staple for good reason. They grow fast, fix nitrogen in the soil, and handle summer heat well. Direct sow seeds in late spring after the last frost date. They’re ready to harvest as shell peas in about 60 to 70 days, or let them dry on the vine for dried beans.

quick growing vegetables in jacksonville fl sweet potatoes

Cool Season Vegetables

Tomatoes

In Florida, tomatoes are actually a cool-season crop. Plant transplants in North Florida between January and March, or again in August and September for a fall crop. Summer heat causes blossom drop, so timing is everything. Look for heat-tolerant varieties like ‘Solar Fire’ or ‘Heatmaster’ for the best results in our climate.

Lettuce

Lettuce is one of the simplest vegetables to plant during Florida’s cool season. Many varieties are ready to harvest in 45 to 60 days, and cut-and-come-again types give you multiple harvests from a single planting. Direct sow or transplant starts from October through February in North Florida. Loose-leaf varieties like ‘Black Seeded Simpson’ and ‘Red Sails’ perform especially well here.

Kale

Kale is one of the most productive cool-season crops in Florida. It tolerates light frost, produces over a long harvest window, and actually improves in flavor after a cold snap. Sow seeds or transplant starts from September through February. Varieties like ‘Lacinato’ (dinosaur kale) and ‘Red Russian’ are reliable producers in Northeast Florida.

Collard Greens

Collard greens are a Florida classic. They’re tough, productive, and one of the more heat-tolerant leafy greens you can grow, though they perform best in the cool season. Plant from September through January in North Florida. Harvest continuously by picking outer leaves, and they’ll keep producing through most of the winter.

Radishes

Radishes are the ultimate quick growing vegetable for impatient gardeners. Some varieties are ready to harvest in as little as 22 to 25 days from seed. Direct sow from October through February in North Florida. They fill gaps between slower-growing vegetables beautifully and are essentially trouble-free during the cool season.
simple vegetables to plant in jacksonville fl

What Is The Best Soil For A Florida Vegetable Garden?

Florida’s native soil can present a challenge for growing crops. The state’s sandy, porous ground drains too quickly to hold the nutrients and moisture vegetables need to thrive. The fix is straightforward: use a quality amended soil or potting mix rather than planting directly into native sand.

At Earth Works, we carry a range of soils selected specifically for Northeast Florida gardeners. Here are four worth knowing:

FoxFarm Ocean Forest Potting Soil

Ocean Forest is designed for container gardeners. It’s made from a blend of aged forest products, sphagnum peat moss, earthworm castings, bat guano, fish emulsion, and crab meal. The combination gives it a light, aerated texture that drains well while still holding enough moisture for healthy root development.

ProMix Organic Premium Vegetable and Herb Mix

ProMix Organic is formulated specifically for fruits, herbs, and vegetables, which makes it a natural fit for everything in this guide. It works directly in the ground or in containers, and its ingredients include Canadian sphagnum peat moss, peat humus, compost, perlite, gypsum, limestone for pH adjustment, organic fertilizer, and mycorrhizae. Mycorrhizal fungi help plant roots absorb water and nutrients more efficiently, which is especially valuable in Florida’s sandy soil.

FoxFarm Happy Frog Original Potting Soil

Happy Frog is built for container plantings. It includes earthworm castings, bat guano, and aged forest products amended with active soil microbes. The microbe content helps break down organic matter and makes nutrients more accessible to plant roots, which is important in containers where soil biology can deplete quickly.

Wild Earth Mix

Wild Earth Mix is an all-purpose soil available in bags and bulk, suitable for container gardens, raised beds, and use directly in the ground. Ingredients include organic compost, aged forest products, kelp, and peat humus. It’s a versatile option when you need larger volumes of amended soil across multiple beds.

For a deeper look at soil composition and the full range of soils we carry, visit our Good Gardening Soil for Northeast Florida blog.

Growing a Balcony Vegetable Garden

You don’t need a yard to grow your own food. A balcony vegetable garden is completely achievable in Florida. Apartments and condos can support productive container setups with the right plant choices. The key is selecting compact, container-friendly varieties and using a quality potting mix rather than garden soil, which compacts badly in pots.
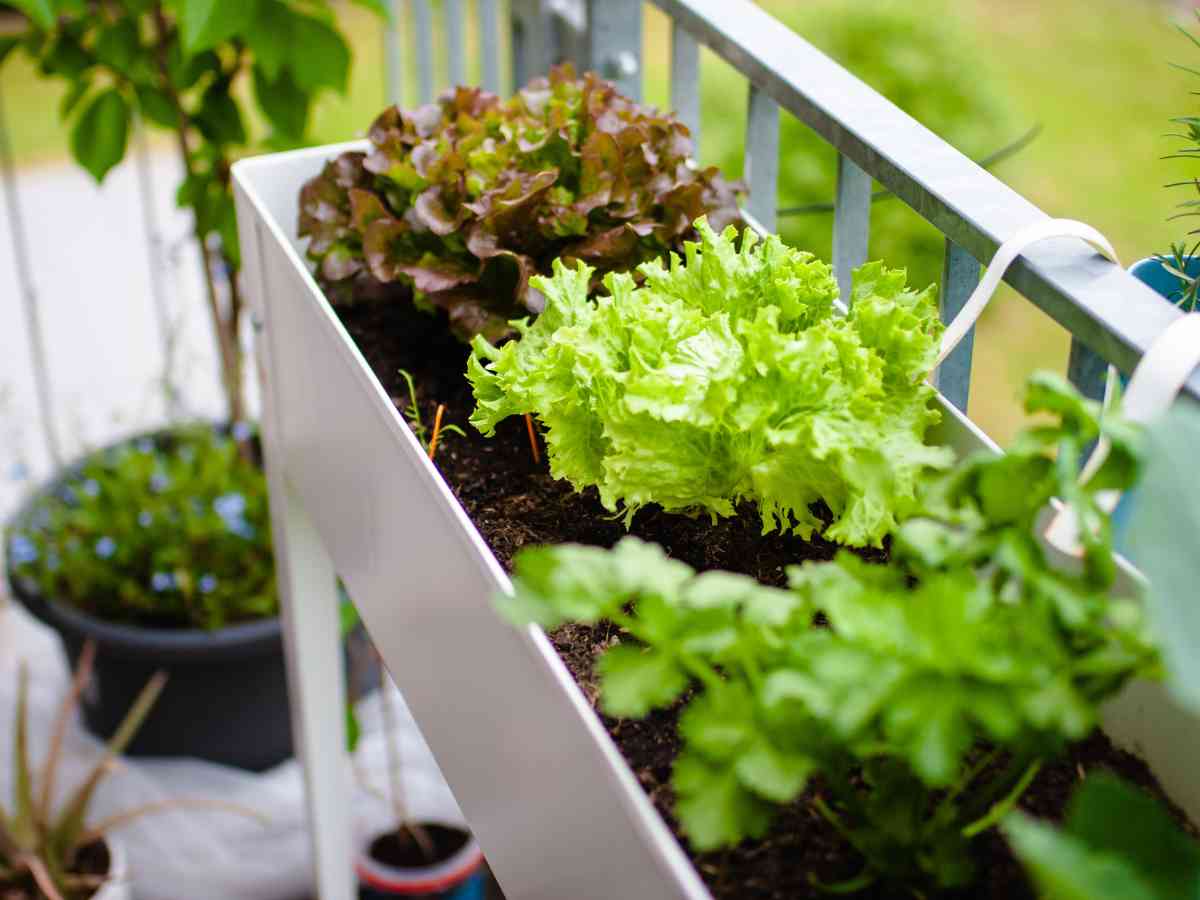
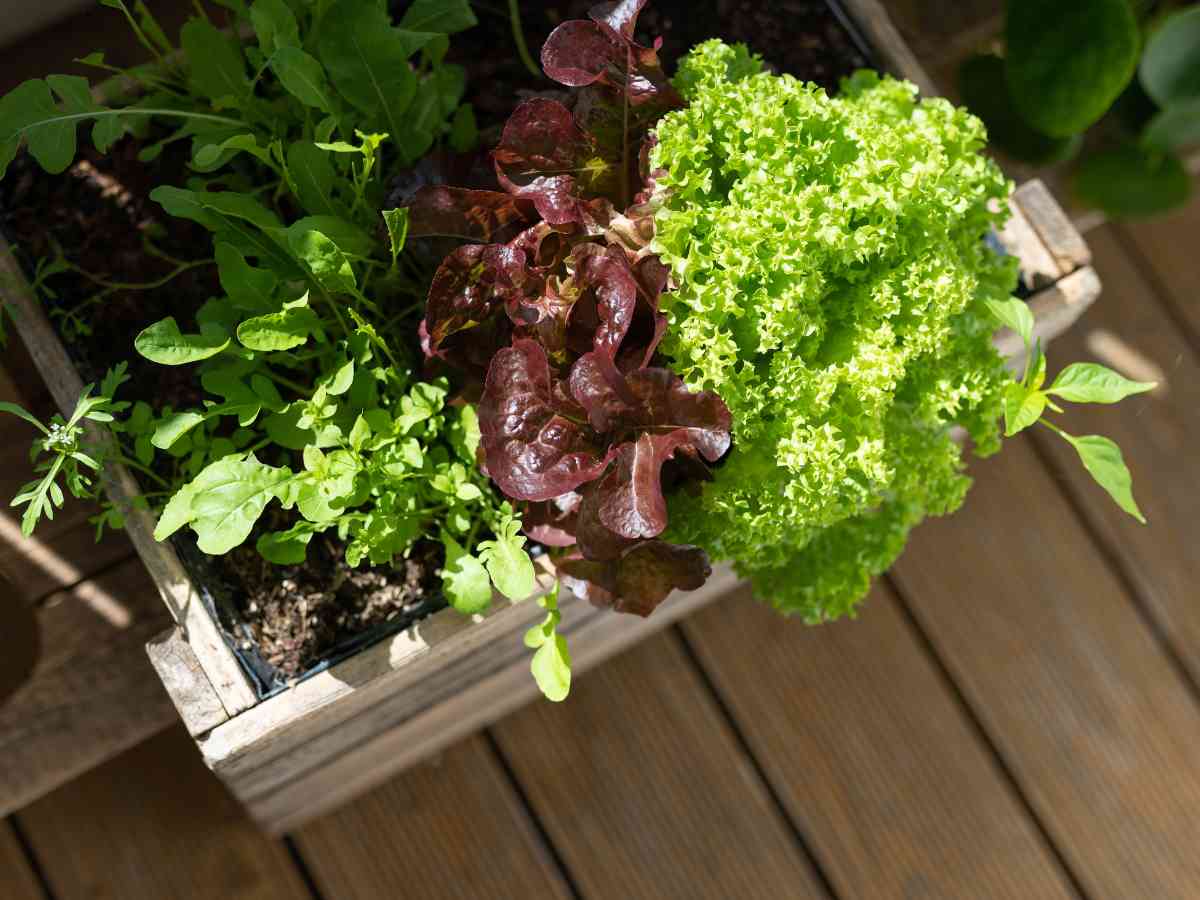
balcony vegetable garden with lettuce

Herbs

Basil, parsley, chives, and mint grow easily in small pots and are useful year-round in the kitchen. Most herbs prefer full to partial sun and do well in 6 to 8 inch containers with regular watering.

Cherry Tomatoes

Cherry tomatoes are far more forgiving than full-size varieties in containers. Look for compact determinate types like ‘Tumbling Tom’ or ‘Tiny Tim.’ Plant in the cool season (September through March in North Florida) for the best balcony results.

Scallions

Scallions grow quickly, take up almost no space, and can be harvested continuously. A single 6-inch pot can yield a steady supply. Cut at soil level and new growth will follow.

Lettuce

Lettuce is one of the most productive balcony crops during Florida’s cool season. A window box or shallow container works well. Harvest outer leaves as needed and keep it out of direct afternoon sun in warmer months to prevent bolting.

Celery

Celery grows well in containers during Florida’s cool season and doesn’t need much horizontal space. It does need a deep enough pot (at least 8 inches) for its root system, prefers consistent moisture, and appreciates some afternoon shade during the warmest parts of the day.

Start Growing Vegetables in Florida This Season

Florida’s two-season calendar gives you more growing opportunity than most gardeners realize. The easiest vegetables to grow here aren’t the same ones that make sense in Ohio or Oregon. They’re the ones matched to our specific seasons, our heat, and our soil.

In the warm season, okra, sweet potatoes, eggplant, bell peppers, and black-eyed peas thrive with minimal fuss. In the cool season, tomatoes, lettuce, kale, collard greens, and radishes, some of the most simple vegetables to plant anywhere, produce reliably through Florida’s mild winters. Amend your soil, match your crops to your season, and you’re most of the way there.

Ready to get started? Stop by Earth Works Garden Center on Beach Blvd in Jacksonville. Our staff can help you pick the right plants, soils, and supplies for your space, whether you’re putting in a raised bed, planting in the ground, or setting up a balcony vegetable garden. Give us a call at (904) 996-0712.

Happy gardening from Earth Works Gardens!

The Right Way to Plant New Trees: Why You Need a Ring Bowl

The Right Way to Plant New Trees: Why You Need a Ring Bowl

Earth Works Gardens · Planting & Installation
Creating a ring bowl for a newly planted tree — Earth Works Gardens

We just got a fresh shipment of palm trees in, and that means planting season is in full swing. This week on Grow Better Weekly, we’re talking about one of the simplest — and most important — steps after planting a tree: creating a ring bowl (also called a rain bowl). It may look basic, but this small soil berm can make a huge difference in helping your tree establish strong, healthy roots.

Watch A How-To Video With Matt:

How to Create a Ring Bowl

Making a ring bowl is simple and only takes a few minutes.

Step-by-Step

  1. Use extra soil from the planting hole (or additional soil if needed).
  2. Build a raised ring of soil around the outer edge of the root ball.
  3. Shape it like a donut, leaving the center hollow.
  4. Make sure the ring is high enough to hold water when filling.
The goal is to create a basin so water pools around the root ball instead of running away.

Why a Ring Bowl Matters

  • ✓It directs water exactly where your tree needs it most – the root ball.
  • ✓It helps capture rainwater instead of letting it run off.
  • ✓It prevents irrigation from spreading too far away from young roots.
  • ✓It encourages deeper root growth during the critical establishment phase.

Freshly planted trees need consistent moisture. A ring bowl helps ensure they get it.

Water Schedule for New Trees

Once your ring bowl is built, watering becomes much more effective.

For a tree this size:

Recommended Schedule
First month
Hose on a trickle for 15–20 minutes every day.
Second month
Every other day.
Third month
Gradually reduce to 2–3 times per week.

(Adjust timing based on tree size, root ball size, and rainfall.)

Set the hose on a slow trickle and let the ring fill. This slow soak encourages deeper root growth and better establishment.

Uses in the Landscape

Ring bowls are especially important for newly planted palms and larger trees that need consistent moisture while roots establish. Without a basin, water can run off or spread too thinly across the surrounding soil. This simple technique helps maximize both irrigation and rainfall — making it one of the easiest ways to protect your investment in new trees.

A ring bowl may look simple, but it plays a big role in helping newly planted trees thrive. By directing water straight to the root ball and following a consistent watering schedule, you give your tree the best chance at strong, healthy growth. If you’re planting new trees this season, stop by Earth Works — we’ve got plenty in stock, and we’re happy to help you grow better.

Happy gardening from Earth Works Gardens!

Foliar Feeding: The Garden Shortcut for Healthier Plants

Foliar Feeding: The Garden Shortcut for Healthier Plants

Earth Works Gardens · Garden Tips & How-Tos
Foliar feeding — Earth Works Gardens

If you’ve ever wished your plants could perk up a little faster—more color, stronger growth, happier leaves—foliar feeding might be the garden “shortcut” you’ve been missing. Foliar feeding is the practice of spraying liquid nutrients directly onto the leaves, giving plants a quick boost when they need it most. It’s not a replacement for healthy soil, but it is an excellent tool for better results—especially in Northeast Florida, where heat, humidity, sandy soils, and heavy rains can all impact nutrient availability.

Watch A How-To Video With Matt:

Foliar Feeding Tips For Best Results

Foliar feeding is simple, but, like most garden hacks, it works best when used correctly. Timing, dilution, and product choice make all the difference—because the goal is to boost your plants, not stress them.

Care & Maintenance Tips

  • ✓Always follow label directions. (More is not better—too strong can burn leaves.)
  • ✓Spray in the cool parts of the day—early morning is best. Heat + spray can cause leaf scorch.
  • ✓Coat the leaves thoroughly, including the undersides when possible (that’s where lots of pores live).
  • ✓Avoid spraying before heavy rain so the plant has time to absorb the nutrients.
  • ✓Don’t foliar feed drought-stressed plants mid-day. Water the plant first, then spray later.
  • ✓Use clean water and a clean sprayer to avoid clogging and unwanted residue.
  • ✓Start with a small test area on delicate plants or houseplants, just to be safe.
  • ✓Pair it with healthy soil practices. Foliar feeding is a boost—not the foundation.
Fun Facts
  • ●Leaves can absorb certain nutrients much faster than roots can.
  • ●Foliar feeding can be especially helpful when plants are stressed by heat, drought, transplant shock, or pest pressure.
  • ●It’s often used by professional growers to correct deficiencies quickly—especially with micronutrients like iron, magnesium, and manganese.
  • ●Some foliar sprays can also act as a “plant tonic,” supporting overall vigor and resilience.

Uses In The Garden

Foliar feeding is one of those “secret weapons” that can make a noticeable difference in your garden with very little effort. It’s especially useful for plants that need quick improvement in leaf color, flowering, or growth—like annuals, vegetables, citrus, and tropicals. It can also be a game-changer during the heat of summer when roots may struggle to absorb nutrients efficiently from hot, dry, or waterlogged soil. Think of foliar feeding as a quick sip of nutrition that helps plants bounce back faster and perform better between regular feedings.

Want greener leaves, better blooms, and healthier plants fast? Foliar feeding is an easy, effective way to give your garden a quick nutrient boost—especially during stressful weather or when plants are showing signs of deficiency. Used correctly, it’s one of the simplest ways to help your garden look its best all season long.

Happy gardening from Earth Works Gardens!

How To Save Freeze-Damaged Houseplants

How To Save Freeze-Damaged Houseplants

Cold snaps happen — and sometimes our plants get caught in the wrong place at the wrong time. This week on Grow Better Weekly, we’re looking at a common situation: a sansevieria left outdoors during a freeze that came back looking… less than great. Before you toss a damaged plant in the compost pile, take a closer look. Many plants, especially sansevieria, can regenerate from the roots if there’s still life below the soil.

Care & Maintenance Tips

When a plant looks damaged after cold weather, inspect it before making big decisions.

Step-by-Step Recovery Tips

  1. Check the roots first. Firm, healthy roots mean there’s still potential for new growth.
  2. Inspect the base of the plant. Look just under the soil line for signs of life or emerging shoots.
  3. Remove only the mushy or fully brown leaves. Yellowed or brown leaves will not turn green again.
  4. Leave healthy green leaves when possible. They help speed up the recovery process.
  5. For plants in the ground: Wait until after the frost-free date (around mid-March) before cutting back damaged foliage.
  6. For potted plants that can be brought indoors: You can prune sooner if they’re protected from future frost.

Specifications

Featured Plant: Sansevieria (Snake Plant)
Topic: Freeze Recovery & Pruning Basics
Best Time to Prune In-Ground Plants: After frost-free date (around St. Patrick’s Day in Northeast Florida)
Maintenance Level: Easy with patience
Growth Speed: Slow to moderate recovery

Close-up of a root-bound snake plant in a cracked terracotta pot, with dense tangled roots and compacted soil exposed around the base of the plant.
Smiling couple posing together against a plain background, with the man wearing a green jacket and hat while holding a potted snake plant, and the woman leaning on his shoulder.

Helpful Facts

  • Mushy or browned leaves don’t always mean the whole plant is gone.
  • Healthy roots are a strong sign that a plant can recover
  • Sansevieria (snake plants) are slow growers – patience is key during recovery
  • Damaged foliage can sometimes act as insulation if another frost occurs.

Helping Your Plant Bounce Back

Once you’ve cleaned up damaged growth, focus on encouraging new roots and shoots. Continue normal watering practices and consider fertilizing to support recovery. A slow-release fertilizer provides nutrients gradually over time, while a liquid or water-soluble fertilizer can deliver nutrients quickly for faster uptake. Just remember – sansevieria doesn’t move fast, so give it time to rebound.

here is still hope for freeze-damaged plants. Before you throw anything away, inspect the roots, remove only the damaged foliage, and give your plant time to recover. With patience, proper care, and a little fertilizer support, many sansevierias – and other houseplants – can bounce back stronger than you think.

Happy gardening from Earth Works Gardens!

SPRING IS OFFICIALLY HERE!

Spring is starting to show off at Earth Works Garden Center, and our newly arrived hibiscus trees are stealing the spotlight. With their bold tropical blooms and vibrant color, these statement plants instantly bring that warm-weather energy back to your patio, poolside, or landscape. If you’ve been waiting for a sign that the season is changing, this is it — fresh hibiscus, sunny days ahead, and the garden center filling up with the colors of spring. 🌺

From Ponds to Bubbling Urns — Discover the Waterscape That Fits Your Yard

From Ponds to Bubbling Urns — Discover the Waterscape That Fits Your Yard

Water has a magical way of transforming a backyard. Whether you’re seeking the tranquil movement of koi beneath lilies or the gentle murmur of water dancing in a ceramic urn, there’s a waterscape style that can turn your outdoor space into a peaceful retreat. At Earth Works Garden Center, we specialize in bringing that vision to life — from full-scale ponds to compact bubbling urns — and everything in between.

Looking at tadpoles copy


Koi Ponds — A Living Ecosystem

For those who love nature in motion, a koi pond offers so much more than water. At Earth Works, our custom-designed water gardens invite wildlife: koi, tadpoles, turtles, frogs — they all become part of your landscape.


These ponds range from “Tadpole Springs” (around 4′×6′) to larger footprints like “Turtle Bay” at 20′×20′, depending on your space and budget.


Why choose this style?

  • It becomes a focal point — visually rich with plants and fish

  • Sounds of moving water add serenity

  • Wildlife and plant life add an ecosystem feel

    Things to consider:

  • Requires maintenance (filtration, cleaning, plants)

  • Needs sufficient space and thoughtful design

  • Requires safety considerations (especially if children/pets are present)

Frog on a lily pad
Vicars waterfall copy

Pondless Waterfalls — The Sound of Water, Less Maintenance

If you love the sound of water rushing over stone, but want something lower-maintenance, a pondless waterfall may be your sweet spot. Earth Works offers configurations that range from a simple drop to a full backyard stream of rock cascades.

Waterfall face

Why choose this style?

  • You get the sound and movement of water without an open pond basin

  • Easier to maintain and safer if you have pets or children

  • Flexible with space — can fit into smaller areas

    Things to consider:

  • The installation still requires underground plumbing and rockwork

  • You’ll want to select a spot where you’ll enjoy the sound (near a window or patio)

paver pation up to a pond

Bubbling Urns & Fountain Kits — A Compact Statement

For patios, balconies or cozy outdoor spaces, bubbling urns and fountain kits offer a dramatic and elegant water feature without overwhelming the yard. At Earth Works you’ll find ready-to-install kits like stacked slate urns, basalt columns, spillway bowls and spheres.

scalloped urn lights

Why choose this style?

  • Smaller footprint — perfect for patios, decks, terraces
  • Quick to install and often DIY-friendly
  • Can serve as a dramatic focal point or accent piece

Things to consider:

  • While smaller, you still need a pump and power source
  • Think about how the sound and sight will integrate into your space
  • Choose a style that complements your landscape architecture and design theme
AQUASCAPE 3 Pc Set Natural Mongolian Basalt photo 64771 12071 12070
stacked slate urn group
stacked slate sphere

Which One Is Right for You?

Here are a few questions to help guide your decision:

  • How much space do you have?
    Large yard? A koi pond or pond‐waterfall combination could be perfect. Smaller space? A bubbling urn or fountain kit might suit better.

  • How much maintenance are you comfortable with?
    Ponds with fish and plants require more upkeep. Fountain kits often require less day-to-day care.

  • What mood are you trying to create?
    Want a lush ecosystem? Go with ponds. Want soothing water sounds and movement? Consider a waterfall. Want a sleek modern accent? Opt for a bubbling urn or fountain kit.

  • How will you use the space?
    Do you want to watch fish, entertain outdoors, or create a quiet reading nook? The waterscape should reflect how you live in your outdoor environment.

Final Thoughts

Whatever your vision, water features bring a unique power to the landscape — the sound, the movement, the sense of calm and connection to nature. With the right style, space and installation partner (hello, Earth Works!), you can create something truly special in your backyard.


Ready to explore? We’ll see you on the tour — and we’ll help you design the waterscape that fits you.

Services

  • Landscape Design & Installation
  • Paver Patios, Paver Walkways, Paver Driveways
  • Firepits, Retaining Walls , Seat Walls,
  • Landscape Lighting, Drainage design & Installation,
  • Lawn Care Services, Lawn Maintenance, Lawn Fertilization
  • Lawn Pest Control, Lawn Weed Control
  • Aeration and Top Dressing
  • Water Features, Koi Ponds,
  • Waterfalls, Bubbling Fountains
  • Garden Center & Pond Supply Store

General Services Areas

Jacksonville (Jax), Jacksonville Beach, Neptune Beach, Atlantic Beach, Ponte Vedra Beach, Ponte Vedra, Fernandina Beach, Amelia Island, Orange Park, St. Johns, Nocatee

Location

GARDEN CENTER
12501 Beach Blvd
Jacksonville, FL 32246

LANDSCAPE OPERATIONS
(not open to the public)
St. Johns Bluff
1057 St. Johns Bluff Rd. N.
Jacksonville, FL 32225

Hours

Monday-Saturday 9-5
Sunday 10-5

HOLIDAY CLOSINGS
New Year’s Day • Easter • Memorial Day
July 4th • Labor Day • Thanksgiving Day
Christmas Eve • Christmas Day

Planning for Cool-Weather Veggies & Herbs in Northeast Florida

Planning for Cool-Weather Veggies & Herbs in Northeast Florida

Plan Now, Harvest Later: Cool-Season Crops Await in Northeast Florida


 October may still feel like summer in Northeast Florida, but smart gardeners know this is the perfect time to start planning for a productive fall and winter vegetable garden. Warm soil and long days give you the opportunity to prepare your garden beds, select your crops, and set the stage for a season of abundant harvests. With a little early effort, you’ll enjoy crisp greens, flavorful roots, and fresh herbs right when you need them most. 


Prepping soil raised garden


Why Start Planning Now?


Cool-season vegetables thrive in our region when temperatures begin to dip in late fall and winter. By prepping your beds early, you’ll be ready to plant as soon as the weather turns favorable. Planning ahead ensures stronger plants, fewer pest problems, and more consistent harvests throughout the cooler months.

    veggie gardens

    Preparing Your Garden Beds

    1. Clear Out Summer Crops: Remove old plants and weeds to reduce pests and diseases.
    2. Enrich the Soil: Add compost or organic matter to replenish nutrients depleted by summer growth.
    3. Check Irrigation: Make sure drip lines or soaker hoses are in working order—cool-weather crops still require steady moisture.
    4. Plan Layouts: Group plants with similar water and sun needs. Consider companion planting to naturally boost yields and deter pests.
    Basket of fall veggies

    What to Plant in Fall & Winter

    As October arrives, it’s planting season for many of Northeast Florida’s most rewarding cool-weather crops.

    • Leafy Greens: Lettuce, kale, collards, Swiss chard, and spinach thrive in cooler temperatures.
    • Root Vegetables: Carrots, radishes, beets, and turnips develop crisp, sweet flavors in cold soil.
    • Brassicas: Broccoli, cauliflower, cabbage, and Brussels sprouts are ideal for fall and winter planting.
    • Cool-Weather Herbs: Parsley, cilantro, dill, fennel, basil, and chives add freshness to holiday cooking.

    Gardening Pro Tip:

    Jump-Start Your Garden

    Start seeds indoors or in shaded trays now. By the time the temperatures drop, they’ll be ready to transplant into your prepared beds. This strategy reduces the risk of bolting from lingering summer heat and gives your garden a head start.

    Starter seeds

    Extend Your Harvest with Succession Planting

     Instead of planting everything at once, sow small batches of seeds every couple of weeks. This method—called succession planting—keeps your garden producing steadily, so you’ll always have something ready to pick for the kitchen.

    Fresh homegrown garden cress sprouts or microgreens on a slice of bun

    Try Microgreens for Quick Rewards

    Don’t want to wait weeks for harvest? Microgreens are the answer. These tiny greens—cut just after sprouting—are packed with nutrients and grow quickly indoors or outdoors. They’re perfect for garnishing meals or adding fresh crunch to salads and sandwiches.

    A Flavorful Season Ahead


    Fall and winter gardening in Northeast Florida offers some of the year’s most rewarding harvests. With fewer pests to battle and an abundance of vegetables and herbs that thrive in cool weather, your garden can become a steady source of fresh, homegrown flavor. Plan now, prep wisely, and you’ll be enjoying crisp greens, hearty roots, and aromatic herbs all season long.

    Services

    • Landscape Design & Installation
    • Paver Patios, Paver Walkways, Paver Driveways
    • Firepits, Retaining Walls , Seat Walls,
    • Landscape Lighting, Drainage design & Installation,
    • Lawn Care Services, Lawn Maintenance, Lawn Fertilization
    • Lawn Pest Control, Lawn Weed Control
    • Aeration and Top Dressing
    • Water Features, Koi Ponds,
    • Waterfalls, Bubbling Fountains
    • Garden Center & Pond Supply Store

    General Services Areas

    Jacksonville (Jax), Jacksonville Beach, Neptune Beach, Atlantic Beach, Ponte Vedra Beach, Ponte Vedra, Fernandina Beach, Amelia Island, Orange Park, St. Johns, Nocatee

    Location

    GARDEN CENTER
    12501 Beach Blvd
    Jacksonville, FL 32246

    LANDSCAPE OPERATIONS
    (not open to the public)
    St. Johns Bluff
    1057 St. Johns Bluff Rd. N.
    Jacksonville, FL 32225

    Hours

    Monday-Saturday 9-5
    Sunday 10-5

    HOLIDAY CLOSINGS
    New Year’s Day • Easter • Memorial Day
    July 4th • Labor Day • Thanksgiving Day
    Christmas Eve • Christmas Day

    Transform Your Landscape with the Timeless Principles of Asian Garden Design

    Transform Your Landscape with the Timeless Principles of Asian Garden Design

    Create harmony, invite reflection, and bring balance to your outdoor space.

    Asian gardens are more than beautiful—they are deeply symbolic, meditative spaces that reflect centuries of cultural wisdom. Whether you’re drawn to the minimalist serenity of a Japanese Zen garden or the layered richness of a Chinese scholar’s retreat, Asian garden styles offer something uniquely peaceful and inspiring. Here’s how you can bring the spirit of the East to your own backyard.

    Charming Japanese style garden with traditional attributes: Oki gata lantern, gravel paths, boxwood trimmed bushes, maple trees. Landscaping photo of japanese garden.


    What Is Asian Garden Design?


    Asian garden design refers to a wide variety of traditional landscaping styles from countries like Japan, China, Korea, and Southeast Asia. While each has its own distinct characteristics, they all share core themes of natural harmony, balance, symbolism, and tranquility.

    Unlike Western-style gardens that often focus on symmetry and bright flowerbeds, Asian gardens aim to mimic nature and invite mindfulness. The result? A space that feels timeless, contemplative, and connected to the world around you.

      Small japanese garden

      Key Principles of Asian Gardening

      1. Simplicity (Kanso)
        Keep design elements to a minimum. Let the space breathe and allow room for thought and emotion.
      2. Naturalness (Shizen)
        Use materials and shapes that feel organic. Irregular stones, curving paths, and windswept plants mimic nature’s own design.
      3. Balance and Asymmetry
        Asymmetry is often used to create visual interest and evoke natural landscapes. A single stone or tree may serve as a focal point rather than a symmetrical arrangement.
      4. Symbolism and Meaning
        Every element has purpose. Rocks may represent mountains or strength; flowing water symbolizes life’s journey or renewal.
      5. Mindfulness
        These gardens are made to be experienced slowly—encouraging visitors to pause, observe, and reflect. Even tending to the garden is a meditative practice.

      Pondless waterfall w face

      Popular Asian Garden Styles to Explore

      Japanese Zen Gardens (Karesansui)

      These dry landscapes use raked gravel, boulders, and minimalist planting to create abstract representations of rivers, mountains, or islands. Zen gardens are designed for meditation and introspection rather than traditional gardening.

      Chinese Classical Gardens

      Often enclosed within walls, these gardens blend pavilions, ponds, rocks, and layered plantings to represent a natural world in miniature. They emphasize movement and transition—each turn in the path offers a new view.

      Korean Traditional Gardens

      Korean gardens integrate the surrounding landscape with gentle slopes, flowing water, and native plants like pine trees, azaleas, and grasses. They aim for effortless harmony with the natural environment.

      Tropical Southeast Asian Gardens

      These vibrant, lush gardens make use of dense plantings, bold foliage, and ornamental water features. You’ll often find lotus ponds, banana plants, orchids, and stone statues, creating a dynamic, immersive feel.

      Plant Choices for an Asian-Inspired Garden

      Selecting the right plants is essential for authenticity and harmony. Here are a few classic favorites:

      Asian garden
      Black pine
      Japanese red maple

      Bamboo

      A symbol of strength and flexibility, and a calming rustle in the breeze.

      Black Pine

      A classic choice for structure and symbolism, often used in bonsai.

      Japanese Maple

      Known for delicate, lace-like leaves and vibrant seasonal color.

      Ophiopogon japonicus
      Kleiner Ziergarten mit kugelförmig geschnittenen Büschen Felsen und Hecke Small ornamental garden with spherical shaped globular bushes and hedges
      Low maintenance Japanese Forest Grass (Carex Oshimensis) boasts vibrant yellow foliage, ideal as an ornamental ground cover.

      Dwarf Mondo Grass

      Perfect for ground cover, adding softness.

      Boxwood

      Very slow-growing and excellent for shaping.

        Ornamental Grasses

        Varieties like Everillo Carex add movement and grace.

        How to Start Your Asian Garden

        Starting an Asian-inspired garden doesn’t mean you have to overhaul your entire landscape. You can begin small:

        • Add a Zen corner with gravel, rocks, and a meditation bench
        • Introduce a stone lantern or bamboo fountain as a focal point
        • Plant a Japanese maple or cluster of ferns in a shaded area
        • Use natural materials like stone, wood, and river pebbles for paths and borders
        • Incorporate a water feature—a bubbling urn, koi pond, or still reflecting pool

        Remember: less is more. Each element should feel intentional and harmonious.

        The Benefits of Asian Garden Design

        ✅ Encourages mindfulness and relaxation

        ✅ Enhances property value with timeless design

        ✅ Low-maintenance plant palette

        ✅ Integrates beautifully with Florida’s subtropical climate

        ✅ Supports wildlife with water and plant diversity

        Visit Earth Works Gardens for Inspiration

        At Earth Works Gardens in Jacksonville, FL, we carry many of the plants and materials you need to create your own Asian-inspired escape—from Japanese maples and bamboo to stone features, pond supplies, and more.

        Our landscape design team can help you bring your vision to life with custom solutions rooted in beauty and balance.

        Find your Zen. Create your calm. Visit us today to get started.

        Services

        • Landscape Design & Installation
        • Paver Patios, Paver Walkways, Paver Driveways
        • Firepits, Retaining Walls , Seat Walls,
        • Landscape Lighting, Drainage design & Installation,
        • Lawn Care Services, Lawn Maintenance, Lawn Fertilization
        • Lawn Pest Control, Lawn Weed Control
        • Aeration and Top Dressing
        • Water Features, Koi Ponds,
        • Waterfalls, Bubbling Fountains
        • Garden Center & Pond Supply Store

        General Services Areas

        Jacksonville (Jax), Jacksonville Beach, Neptune Beach, Atlantic Beach, Ponte Vedra Beach, Ponte Vedra, Fernandina Beach, Amelia Island, Orange Park, St. Johns, Nocatee

        Location

        GARDEN CENTER
        12501 Beach Blvd
        Jacksonville, FL 32246

        LANDSCAPE OPERATIONS
        (not open to the public)
        St. Johns Bluff
        1057 St. Johns Bluff Rd. N.
        Jacksonville, FL 32225

        Hours

        Monday-Saturday 9-5
        Sunday 10-5

        HOLIDAY CLOSINGS
        New Year’s Day • Easter • Memorial Day
        July 4th • Labor Day • Thanksgiving Day
        Christmas Eve • Christmas Day

        Crape Myrtles for Florida Yards: Varieties, Uses & Care

        Crape Myrtles for Florida Yards: Varieties, Uses & Care

        Best Crape Myrtles for Northeast Florida Landscapes

        If you’re looking to add long-lasting color, sculptural beauty, and heat-tolerant performance to your Florida yard, crape myrtles are your go-to flowering trees. Known as the “lilac of the South,” crape myrtles are a staple of Southern landscapes—and for good reason.

        With vibrant summer blooms, striking bark, and a wide range of sizes, crape myrtles are among the most versatile and low-maintenance trees for Northeast Florida. Whether you’re planting a feature tree in the front yard, lining a driveway, or adding color to a small courtyard, there’s a crape myrtle that fits your vision.

        Twig with beautiful white flowers Lagerstroemia indica (crepe myrtle) blooms in the park. Selective focus. Macro. Israel


        Where to Use Crape Myrtles in the Landscape


        Crape myrtles aren’t just pretty—they’re practical. Here are a few of the best ways to use them in your yard:

        • As a Focal Point: Frame an entryway or highlight a landscape bed with a large, single-trunk crape myrtle.
        • In Rows: Plant mid-sized varieties along driveways or fences for a colorful and structured look.
        • In Containers or Courtyards: Compact and dwarf cultivars provide all the beauty in smaller, more manageable forms.
        • As a Flowering Privacy Screen: Taller varieties can create a beautiful backdrop or soft privacy barrier with year-round interest.
        Blooming summer white crepe myrtle in residential neighborhood.
        Close up of crape myrtle trees in full bloom with vibrant pink, purple, and white flowers, showcasing their smooth bark, slender branches, and lush foliage in a garden or park setting under sunlight

        Why Gardeners Love Crape Myrtles in Florida

        Crape myrtles are beloved for being:

        • 🌞 Heat-tolerant
        • 💧 Drought-resistant once established
        • 🌿 Low-maintenance
        • 🌸 Long-blooming—from mid-summer to early fall
        • 🍂 Seasonally stunning, with fall foliage and unique winter bark

         Plus, they’re easy to shape with light pruning and available in a wide range of colors, from white to deep red and purple.


        Pink Crape Myrtle Tree

        From Classics to Contemporary:

        Traditional Varieties with a Storied History

        Some of the most widely planted crape myrtles in the South include:

        • Tuscarora – Vibrant coral-pink blooms
        • Muskogee – Lavender flowers and fast growth
        • Natchez – Pure white flowers and beautiful cinnamon-colored bark

        These classic varieties were developed by the U.S. National Arboretum and named after Native American tribes, paying homage to their deep connection to the Southeastern landscape. Known for their exceptional bloom time and disease resistance, they’ve set the standard for crape myrtle performance.

        New and Unique Crape Myrtle Varieties for Northeast Florida

        Looking for something bold and different? These newer cultivars offer exciting features like deep foliage color, compact growth, and intense bloom colors:

        0001767 black diamond purely purple crapemyrtle
        Crape Myrtle center stage Pink
        dynamite crape copy red blooms

        Crape Myrtle ‘Black Diamond’

        • Dark burgundy foliage
        • Bright red, pink, or white blooms
        • Great for bold contrast

        Crape Myrtle ‘Center Stage™ Pink’ (Proven Winners)

        • Large hot pink flowers
        • Deep black foliage
        • High-impact curb appeal

        Crape Myrtle ‘Dynamite’

        • Vivid red blooms
        • Upright habit
        • A long-time Southern favorite
        fire purple Crape Myrtle
        0003274 black diamond radiant red crape myrtle
        thunderstruck Crape Myrtle Jacksonville Florida

        Crape Myrtle ‘Fire Magic’ (First Editions®)

        • Bright flower clusters
        • Rich green foliage
        • Tidy and compact

        Crape Myrtle ‘Radiant’

        • Bold color
        • Smaller size, great for yards with limited space

          Crape Myrtle ‘Thunderstruck’

          • Striking foliage and intense blooms
          • Adds dramatic energy to the garden

          LANDSCAPE SPOTLIGHT

          Screenshot 2025 08 25 at 4.44.02 PM
          Ferti-lome Tree and Shrub Drench Video

          Inside Matt’s Garden Shed

          Welcome to Matt’s Garden Shed! Crape Myrtles are known for their stunning summer blooms, but they can still fall victim to a handful of pests and diseases—from aphids and bark scale to powdery mildew and leaf spot. That’s where Ferti-lome Tree & Shrub Systemic Drench comes in. This easy-to-use treatment delivers long-lasting protection right through the roots.

          Gardening Pro Tip: To Prune or Not to Prune?

          Avoid the mistake known as “crape murder”—severely chopping back branches in winter. Crape myrtles don’t need heavy pruning to bloom! Instead:

          • Remove crossing limbs, seed pods, or suckers
          • Maintain the tree’s natural shape
          • Let its sculptural form shine year-round
          Crepe Myrtle Tree

          Services

          • Landscape Design & Installation
          • Paver Patios, Paver Walkways, Paver Driveways
          • Firepits, Retaining Walls , Seat Walls,
          • Landscape Lighting, Drainage design & Installation,
          • Lawn Care Services, Lawn Maintenance, Lawn Fertilization
          • Lawn Pest Control, Lawn Weed Control
          • Aeration and Top Dressing
          • Water Features, Koi Ponds,
          • Waterfalls, Bubbling Fountains
          • Garden Center & Pond Supply Store

          General Services Areas

          Jacksonville (Jax), Jacksonville Beach, Neptune Beach, Atlantic Beach, Ponte Vedra Beach, Ponte Vedra, Fernandina Beach, Amelia Island, Orange Park, St. Johns, Nocatee

          Location

          GARDEN CENTER
          12501 Beach Blvd
          Jacksonville, FL 32246

          LANDSCAPE OPERATIONS
          (not open to the public)
          St. Johns Bluff
          1057 St. Johns Bluff Rd. N.
          Jacksonville, FL 32225

          Hours

          Monday-Saturday 9-5
          Sunday 10-5

          HOLIDAY CLOSINGS
          New Year’s Day • Easter • Memorial Day
          July 4th • Labor Day • Thanksgiving Day
          Christmas Eve • Christmas Day

          Landscaping With Rocks: Match the Rock Size to the Job

          Landscaping With Rocks: Match the Rock Size to the Job

          Earth Works Gardens · Landscape
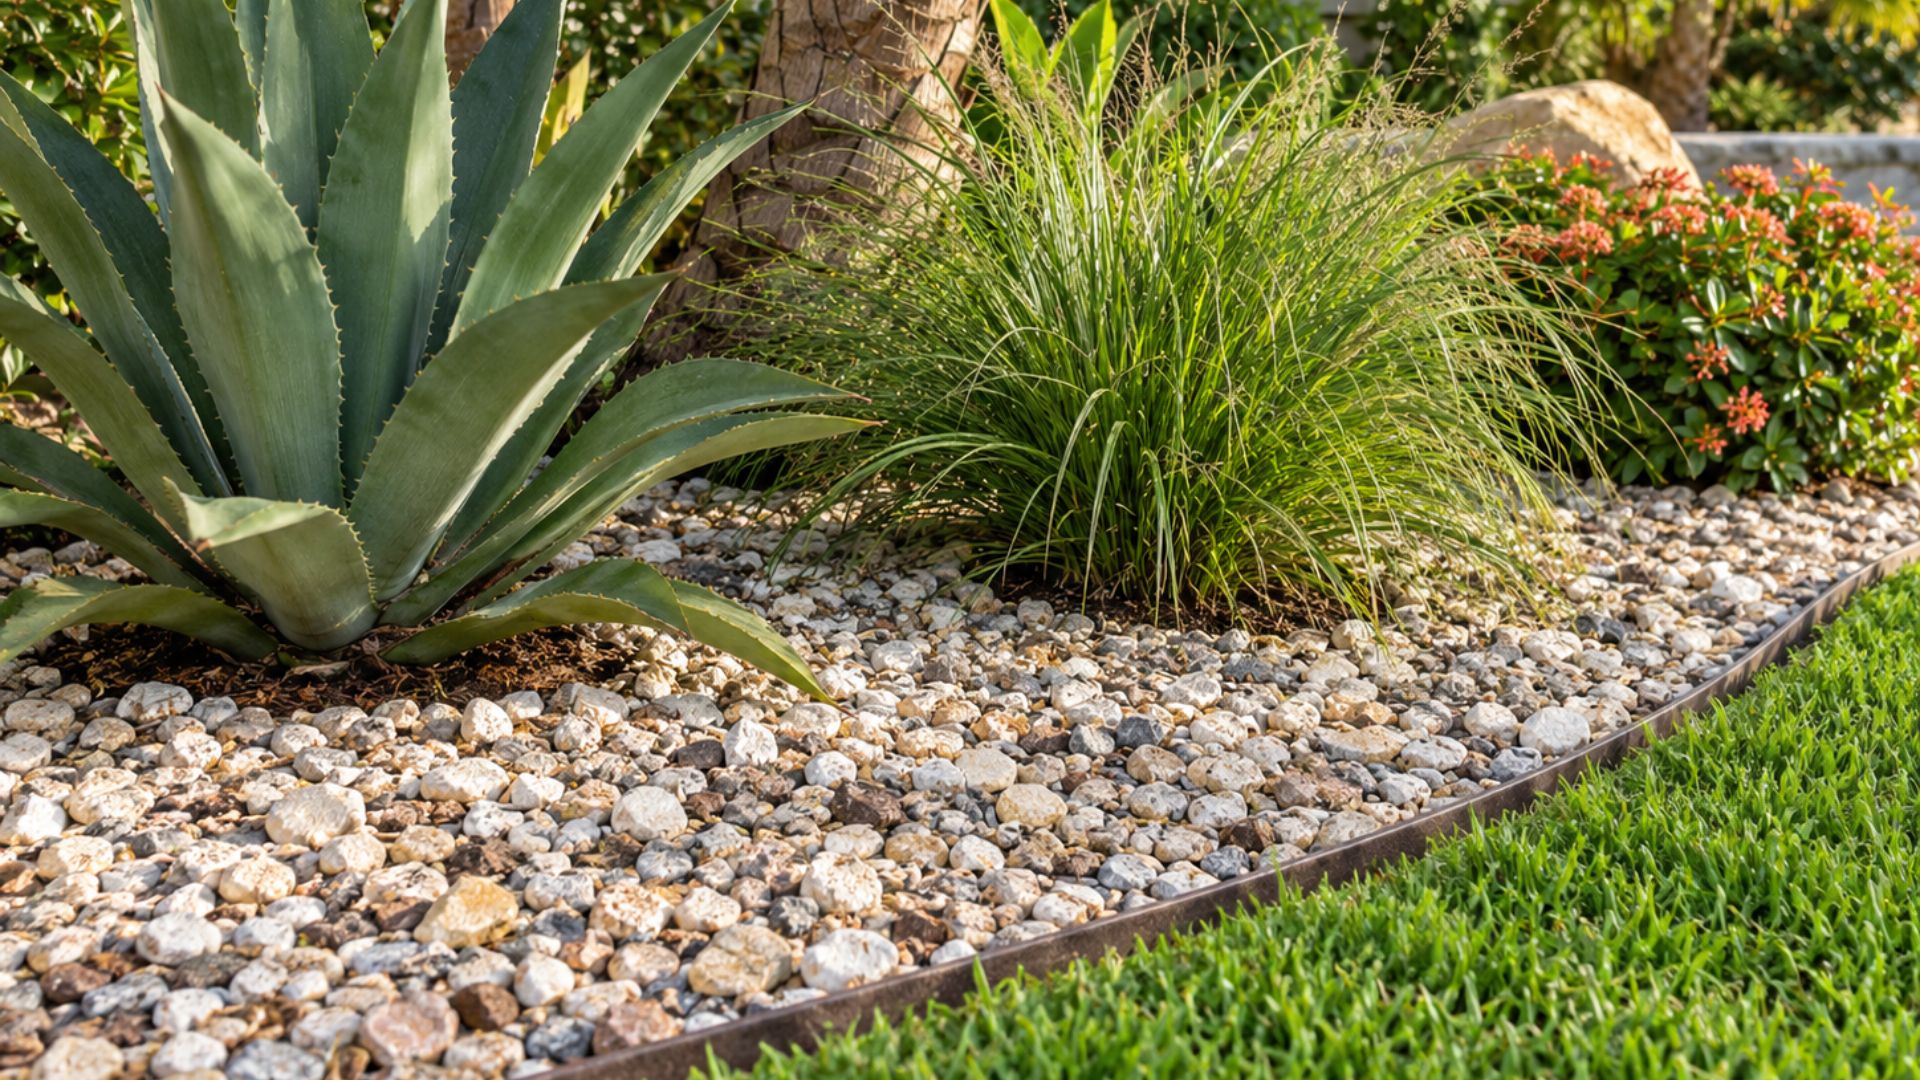
          Decorative landscape rock around agave and ornamental grasses in a Florida garden bed.

          Rock can give a landscape structure and texture that plants and mulch can't. It doesn't break down or need replacing every year, and when it's installed on the right base, it holds up to heavy Florida rain. Landscaping with rocks works best when each size of rock goes where it performs best: gravel in beds and paths, river rock along borders, flat stones for stepping, and boulders as the one or two pieces that catch the eye first. Whether you're refreshing a single bed, adding a walkway, or planning a full backyard project in Jacksonville, it helps to know what each size of rock does well, what should go underneath it, and which landscaping mistakes to avoid.

          Key Takeaways: Landscaping With Rocks

          • Match the rock to the job: small rock for beds and paths, mid-sized rock for borders and stepping stones, and boulders for focal points.
          • Every rock project needs a base. Landscape fabric goes under rock beds, and compacted crushed stone goes under walkways.
          • Small rocks wash out wherever water runs, so use larger rocks under downspouts, roof edges, and slopes.
          • Bury boulders a third to half of their height so they look like part of the landscape instead of something dropped on the lawn.
          • Moving and setting boulders takes heavy equipment, and a boulder placed in the wrong spot can be very difficult to move later.

          Why Rock Size Is Important For Your Landscaping Project

          When rock in a landscape looks off, the problem is usually size, not color or type. Rock that's too small for the space gets lost, and rock that's too large takes over. Pea gravel spread across a long, wide bed looks like just a flat beige surface. Softball-sized river rock lining a narrow path makes the path feel cramped. A single small boulder in the middle of an open lawn looks like it fell off a truck.

          The Four Sizes Of Rock

          • Gravel and pebbles (under 1 inch): This includes pea gravel, crushed granite, and small decorative pebbles. This rock is best for garden beds, walking paths, and filling the gaps between stepping stones.
          • River rock and cobble (about 1 to 6 inches): These are smooth, rounded stones. They are best for bed borders, dry creek beds, and areas under downspouts where water needs somewhere to go.
          • Landscape stone (6 inches to 2 feet): Including flagstones, stepping stones, wall stone, and fieldstone. Best for stepping stone walkways, low bed walls, and edging.
          • Boulders (2 feet and larger): Single stones that can weigh several hundred pounds to several tons. Best for focal points in the landscape, slopes, and pond edges.

          Suppliers size and name rock a little differently, so use these ranges only as a guide and check the actual dimensions before you buy.

          Small Rocks For Garden Beds And Walkways

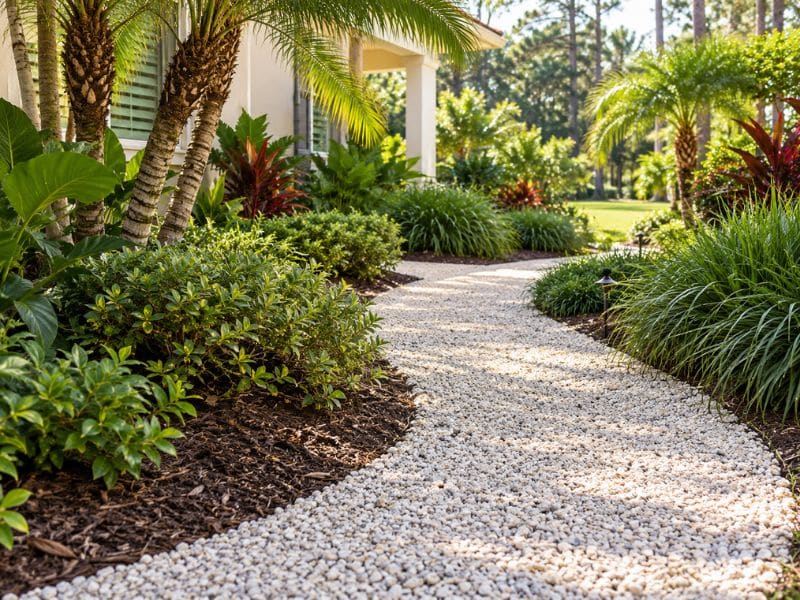
          White gravel walkway curving through a lush Florida landscape with palms and ornamental grasses.

          Small rock settles into an even layer, fills in around plant stems, and lets rainwater pass through to the soil underneath. It's also easy to rake level and comfortable to walk on, which makes it the most practical choice for garden beds and paths.

          Using Small Rocks In Garden Beds

          Spread small rocks about 2 to 3 inches deep in a garden bed. That's enough to cover the soil without burying the crowns of your plants. Keep the rock material pulled back a few inches from stems and trunks so heat and moisture don't build up against the plant. Small rock pairs best with plants that like good drainage, such as succulents, ornamental grasses, and many Florida native plants.

          Placement matters in Florida. Summer storms dump a lot of water in a short time, and small rock under a roof edge or on a slope will wash into the lawn after the first heavy rain. Use river rock or cobble instead in those spots and keep small rock on flat, protected ground.

          Using Small Rocks For Walkways And Paths

          Small rocks can make a good walking surface, but not all small rock works equally well underfoot. Crushed stone and crushed granite make a firmer path than pea gravel. The angular edges of crushed stone lock together when compacted, while the round shape of pea gravel lets it shift and roll underfoot. Pea gravel works for paths that get light use, but crushed stone holds up better to daily foot traffic and wheelbarrows.

          Every gravel path needs edging. Steel, aluminum, or stone edging along both sides of the path keeps gravel from spreading into the lawn, where a mower can pick it up and throw it.

          What To Put Under Landscape Rocks

          Under garden beds, use landscape fabric, a woven or non-woven material that lets water through while keeping rock separated from the soil. In Jacksonville's sandy soil, fabric keeps rock from slowly sinking out of sight, and it slows weeds coming up through the rocks from below.

          Under walkways, start with a few inches of compacted crushed stone base, then add fabric and the surface gravel. The compacted base keeps the path firm and level after years of use.

          Do not use plastic sheeting with small landscape rocks. Plastic blocks water from reaching the soil, so rain pools on top of the rock or runs off, and the plants in the bed lose their water supply.

          Mid Sized Rocks For Garden Beds And Borders

          Mid-sized rock is heavy enough to stay in place, but small enough to set by hand, which makes it the right size for edging. River rock, cobble, and smaller landscape stones define a bed without the cost or engineering of a retaining wall. A row of border stones separates the bed from the lawn, holds mulch or gravel in place, and gives a curved bed a clean, visible edge.

          Building A Garden Bed

          Lay out the shape of the bed with a garden hose, then cut a clean edge in the turf along that line. Set each border stone so its bottom third sits in the soil. Stones set on top of the grass will shift when they're bumped by a mower or a foot, while partly buried stones stay put.

          For a slightly raised bed, stack low stones two layers – or courses – high. Taller garden beds that are expected to hold back more soil need a retaining wall built with a proper footing and drainage, rather loosely stacked stone.

          Use Rock That Matches Your Home

          Use rock colors that match your house: the brick, the stucco, the roof, or the trim. Lighter stones brighten shady beds, and darker stones stand out against green foliage. A beach home in Ponte Vedra might call for light, shell-toned stone, while a brick home inland pairs well with warmer browns and tans.

          Stick to one or two rock types across the property. Five different colors and textures in one yard look unplanned, even when each choice looks good on its own.

          Mid Sized Rocks For Stepping Stone Walkways

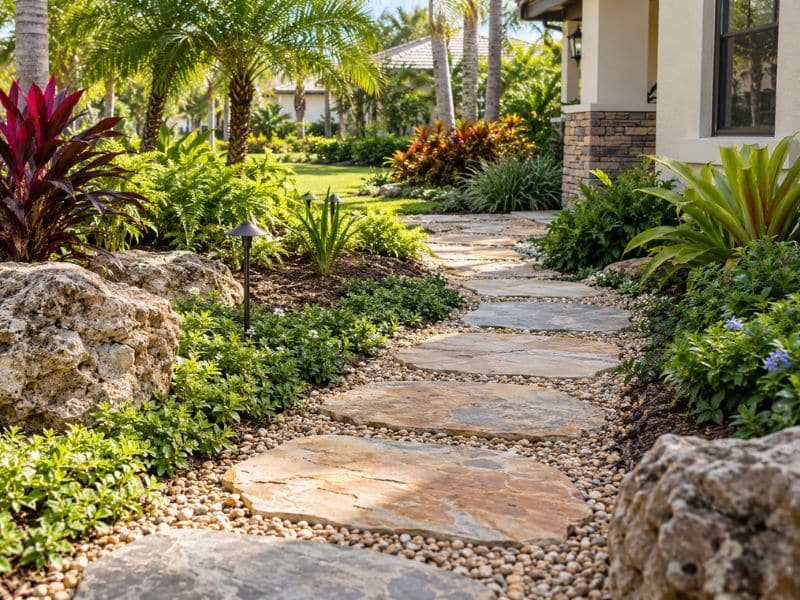
          Flat natural stepping stones set into gravel along a landscaped garden walkway.

          A stepping stone walkway looks intentional when the spacing matches a natural walking stride. For most adults, that means setting stones about 24 inches apart, measured from the center of one stone to the center of the next. Walk the route a few times before finalizing the rock setting, and adjust the spacing to where your feet actually land.

          Set each stone flush with the ground or slightly above it so a mower can pass over and no one catches a toe. It is best to put a bed of sand or fine crushed stone under each stone to keep it from rocking when stepped on. The gaps can be filled with gravel, left as lawn, or planted with a low groundcover such as dwarf mondo grass in shady spots.

          Stepping Stones vs. Gravel Pathways

          Stepping stones work best for casual routes through a lawn or garden bed, like a path from the patio to a side gate. They use less material and let grass or groundcover grow between the stones.

          Gravel pathways create a continuous surface, which makes them better for routes that get daily use, wider paths, or anywhere you'll push a wheelbarrow or mower. They need edging and an occasional top-off of gravel. Many yards combine the two by setting stepping stones into a gravel path, which gives a firm footing with a finished look.

          Landscaping With Large Rocks And Boulders

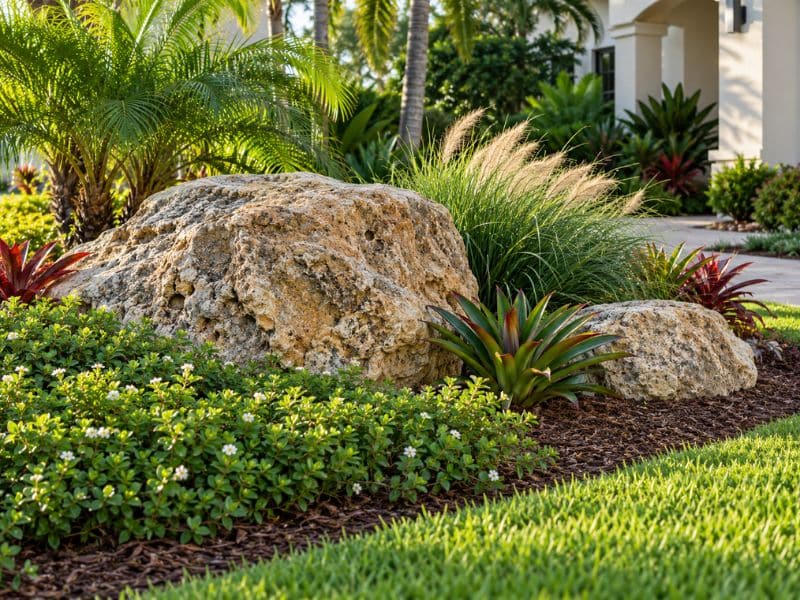
          Large natural boulders partially set into a landscaped garden bed with tropical plants.

          Boulders often become the focal points of a yard, so use them sparingly. Use one boulder or a small group of three where you want to draw the eye, such as the corner of a garden bed or the start of a path. In a mostly flat Jacksonville yard, a well-placed boulder adds height, marks the corner of a bed or the start of a path, or helps hold soil on a slope.

          How To Place Boulders So They Look Natural

          A boulder sitting on top of the grass looks like it was dropped off and left there. Boulders in nature are partly buried, so bury yours a third to half of their height. Set the widest side down, and turn the most weathered face up and toward the main viewing angle.

          To add to the natural look, group boulders in odd numbers with varied sizes, and avoid lining them up or spacing them evenly. Plant groundcover or low perennials around the base of each one so the stone looks like part of the bed.

          Why Boulder Placement Is A Job For Professionals

          A boulder large enough to serve as a focal point can weigh as much as a car. Moving a boulder safely usually takes equipment like a skid steer or mini excavator, lifting straps, and a crew that knows how to rig and set heavy stone. Getting the boulder into the backyard takes planning too. Gate widths, irrigation lines, septic systems, and soft ground all affect how a boulder gets from the driveway to the backyard.

          Setting a boulder can include digging, and digging can come with legal requirements. Professionals know what Florida law calls for, like having buried utility lines marked, and take care of it before the work starts.

          A boulder set in the wrong spot is very difficult to move without bringing landscaping equipment back. Earth Works' landscape crews handle boulder placement and heavy rock work from delivery through planting.

          Using Rocks Around Your Backyard Pond

          Without rock, a pond looks like a hole that was dug and filled with water. You can see the liner edge, and the transition from lawn to water is abrupt. Rock is what makes a pond look like it belongs in the landscape.

          Cover the liner edge with a mix of boulders and cobble rather than a single ring of same-sized stones, which looks like a necklace laid around the water. Vary the heights, let a few stones step down into the shallow shelves, and keep gravel on the shelves thin. Earth Works' landscape team builds koi ponds and pondless waterfalls with this kind of layered rockwork. If you already have a pond, our pond cleaning guide covers how to keep the rock and gravel clean once it's in place.

          What Are The Best Types Of Rocks For Florida Landscapes

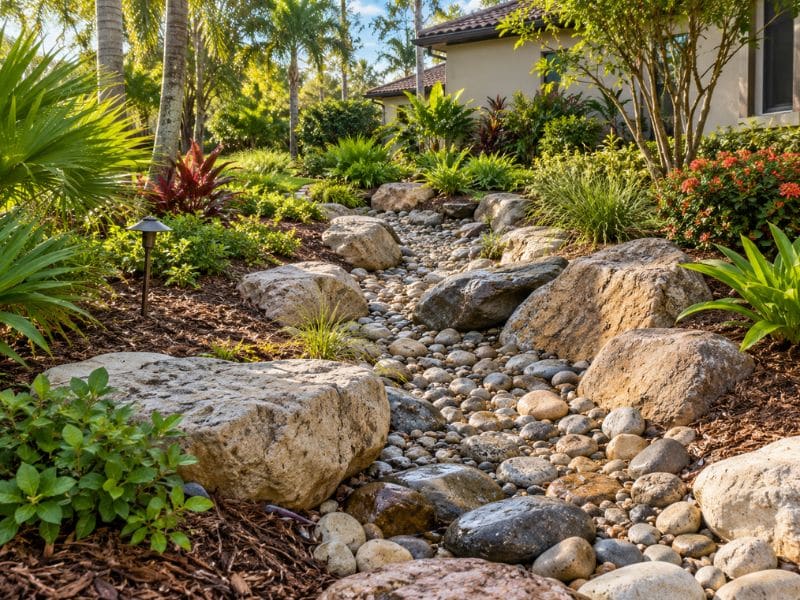
          Dry creek bed made with river rock and larger stones in a landscaped Florida yard.

          Landscaping with rocks in Northeast Florida means planning for heavy summer rain, sandy soil, and strong sun. These rock types hold up well here:

          • River rock: Smooth and durable, and it stays in place where water flows. It's the standard choice for dry creek beds that carry stormwater away from the house.
          • Crushed granite and crushed stone: Packs firmly for paths and drains well after storms.
          • Coquina: A Florida stone made of compressed shell, quarried along the Atlantic coast. It's the same stone used to build the Castillo de San Marcos in St. Augustine, and its light, shell-textured look suits coastal homes.
          • Florida limestone: Light-colored and widely available in the state. Limestone can raise soil pH over time, so keep it away from acid-loving plants like azaleas, camellias, and gardenias.
          • Lava rock: Lightweight and easy to spread, but its dark color absorbs heat, so it's best kept away from tender plants in full sun.

          Common Mistakes To Avoid When Landscaping With Rocks

          Most problems that occur with rock landscaping show up within the first year. The most common ones:

          • Small rock where water flows: Pea gravel under a downspout can end up washed into the lawn after the first storm.
          • No edging: Gravel can spread into the grass, and a mower throws it.
          • No base under the rock, or plastic underneath: Rock sinks into sandy soil without fabric, and plastic traps water on the surface.
          • Too many boulders: A yard with boulders everywhere has no real focal point.
          • Boulders sitting on the surface: Unburied boulders look temporary, rather than embedded and artfully placed.
          • Too many rock types: Mixing several colors and textures makes the yard look unplanned.
          • Rock piled against plant stems: Rock pressed against stems and trunks traps heat and moisture against the plant.

          How Much Does Rock Landscaping Cost In Jacksonville?

          Rock projects vary widely in cost, and the price depends on a few main factors:

          • Rock type: Common gravel and crushed stone usually cost less than specialty stone like flagstone or imported beach pebbles. Rock quarried closer to Florida typically costs less to ship.
          • Size and weight: Small rock is sold by the ton or cubic yard. Boulders and large landscape stones are often priced individually.
          • Coverage and depth: A larger area or deeper layer takes more material.
          • Delivery and access: Tight gates, long carries from the driveway, and backyard-only access add labor time and may require smaller equipment.
          • Site prep: Removing sod, grading, laying fabric, compacting base, and installing edging all add to the cost, and skipping them shortens the life of the project.
          • Equipment and labor: Boulders and heavy stone need machinery and an experienced crew to set them correctly.

          When comparing quotes, ask for material and labor to be listed separately so you can see exactly what you're paying for.

          Let Earth Works Design Your New Backyard

          Earth Works has been designing and building Jacksonville landscapes since 1988. Our design team handles landscaping with rocks at every scale, from a single bed border to dry creek beds, retaining walls, firepits, and pond rockwork.

          Our design process follows four steps: a free consultation at our Garden Center on Beach Blvd, an on-site visit, a design reveal back at the Garden Center where you can see materials in person, and installation. You choose the scope and your level of investment before we start drawing, and if you move forward with the build, 50% of your design fee goes toward it.

          Contact Us Today

          Landscaping With Rocks: FAQs

          How do you move large landscaping boulders into a backyard?

          Large boulders are moved with a skid steer, mini excavator, or similar machine, using lifting straps rated for the weight. Before the boulder is moved, the crew measures gate widths, maps the route around irrigation lines and septic systems, and lays down plywood or ground mats to protect the lawn. In Florida, it may be required to call Sunshine 811 before digging so that buried utility lines are marked first.

          Do I need to place landscaping fabric underneath rocks?

          For garden beds and walkways, yes. Fabric keeps rock from sinking into sandy soil and slows weeds coming up from below. Use a permeable landscape fabric, never plastic, so water can still reach the soil. Boulders don't need fabric underneath, since they're set directly into the ground.

          How do I keep weeds from growing through my rocks in my garden?

          Start with landscape fabric under the rock to block weeds coming up from the soil. Over time, leaves and dirt collect on top of the rock and give weed seeds a place to sprout, so blow or rake debris off the rock regularly. Pull weeds while they're small, before their roots reach the fabric. A rock layer of at least 2 inches also makes it harder for seeds to reach the soil.

          What is the most affordable landscape rock?

          Pea gravel and crushed stone are usually the lowest-cost options, since they're widely available and sold in bulk by the ton or cubic yard. Rock sourced closer to Florida also tends to cost less than imported stone because of shipping. Installation is the other half of the price, so a lower-cost rock on a properly prepared base will outlast a premium rock placed on bare soil.

          Which plants do well with rocks?

          Plants that like good drainage and full sun pair best with rock. In Northeast Florida, good choices include coontie, muhly grass, firebush, blanket flower, and beach sunflower, along with succulents and ornamental grasses. Our Garden Center carries Florida-native plants, succulents, and palms, and our horticulturists can help you choose plants for a rock bed based on its sun exposure and soil.

          Spring Lawn Pests to Look Out For: Chinch Bugs

          Spring Lawn Pests to Look Out For: Chinch Bugs

          Pest Patrol: Chinch Bugs & More – What to Watch for

          Spring is here—and so are the bugs. As temperatures rise, lawn and garden pests become more active and can quickly take a toll on your landscape if left unchecked. That’s why we’re launching a new monthly feature to help you spot and stop common pests before they do serious damage.

          Each month, we’ll highlight a few of the usual suspects, show you what to look for, and share the best ways to manage them—naturally or with targeted treatments.

          This month, we’re kicking things off with a video about chinch bugs—a tiny menace that can cause big problems in your lawn. We’re also spotlighting three more pests you may encounter: mole crickets, grubs, and aphids. Scroll down to learn how to identify each one and what to do if you find them.

          Chinch Bug Video

          Chinch bugs are one of the most destructive lawn pests in Northeast Florida—especially in St. Augustine grass. In this video, Chad from Earth Works in Jacksonville, FL explains how to spot early signs of chinch bug damage, where they typically hide (like along sidewalks and driveways), and how to confirm their presence using a simple float test.

          You’ll also learn:

          ✔️ Why drought-stressed lawns are most vulnerable

          ✔️ The difference between chinch bug and sod webworm damage

          ✔️ How and when to treat using contact insecticides

          ✔️ Why quick action is critical to avoid permanent turf damage

          If you’re seeing browning patches in your lawn and wondering if chinch bugs are to blame.

          This guide will help you take the right steps. 

          Common Lawn & Garden Pests

          Mole cricket Grub aphid

          Mole Crickets

          1. What They Look Like: Light brown, about 2 inches long, with large front legs that look like tiny shovels—perfect for digging.
          2. Where You’ll Find Them: These pests tunnel underground, usually in lawns or vegetable beds, and are active at night. Their presence is often spotted by raised, loose soil and ½-inch wide tunnels.
          3. How to Control Them:
          • Apply beneficial nematodes or insecticides labeled for mole cricket control in early evening.
          • Water the lawn before treatment to draw them closer to the surface.
          • Late spring and early fall are key treatment windows.

          Grubs

          1. What They Look Like: “C”-shaped, dirty white larvae with darkened rear ends and reddish-brown heads, ranging from ¼ to 2½ inches long.
          2. Where You’ll Find Them: In the root zone of your lawn or garden beds, often under the turf. They feed on plant roots and tubers, causing grass to brown or lift easily.
          3. How to Control Them:
          • Apply grub-specific insecticides in late summer or early fall when young grubs are near the surface.
          • Beneficial nematodes are a great organic control option.
          • Keep your lawn healthy and well-aerated to discourage infestation.

          Aphids

          1. What They Look Like: Tiny, pear-shaped insects (1/32 to 1/8 inch) that may be green, yellow, black, pink, or brown.
          2. Where You’ll Find Them: On the undersides of leaves, tender stems, or flower buds—often in clusters.
          3. How to Control Them:
          • Spray plants with a strong stream of water to dislodge them.
          • Use insecticidal soap or neem oil for heavier infestations.
          • Encourage beneficial insects like ladybugs and lacewings to keep aphid populations in check.
          • Watch for curled leaves or stunted growth—aphids also spread plant viruses.

          LAWN CARE PRO TIP

          Don’t Bag Those Clippings!


          Leaving your grass clippings on the lawn isn’t lazy—it’s smart! Clippings break down quickly and return valuable nutrients, especially nitrogen, back into the soil. That means a greener, healthier lawn and less need for fertilizer.

          💡 Bonus: It also helps your lawn retain moisture and reduces landfill waste. Just make sure your mower blade is sharp and you’re not cutting more than 1/3 of the grass height at a time.

          Let your clippings work for you!

          Services

          • Landscape Design & Installation
          • Paver Patios, Paver Walkways, Paver Driveways
          • Firepits, Retaining Walls , Seat Walls,
          • Landscape Lighting, Drainage design & Installation,
          • Lawn Care Services, Lawn Maintenance, Lawn Fertilization
          • Lawn Pest Control, Lawn Weed Control
          • Aeration and Top Dressing
          • Water Features, Koi Ponds,
          • Waterfalls, Bubbling Fountains
          • Garden Center & Pond Supply Store

          General Services Areas

          Jacksonville (Jax), Jacksonville Beach, Neptune Beach, Atlantic Beach, Ponte Vedra Beach, Ponte Vedra, Fernandina Beach, Amelia Island, Orange Park, St. Johns, Nocatee

          Location

          GARDEN CENTER
          12501 Beach Blvd
          Jacksonville, FL 32246

          LANDSCAPE OPERATIONS
          (not open to the public)
          St. Johns Bluff
          1057 St. Johns Bluff Rd. N.
          Jacksonville, FL 32225

          Hours

          Monday-Saturday 9-5
          Sunday 10-5

          HOLIDAY CLOSINGS
          New Year’s Day • Easter • Memorial Day
          July 4th • Labor Day • Thanksgiving Day
          Christmas Eve • Christmas Day

          Share Your Story!

          Skip to content